


 Interfacing with Arduino Uno")
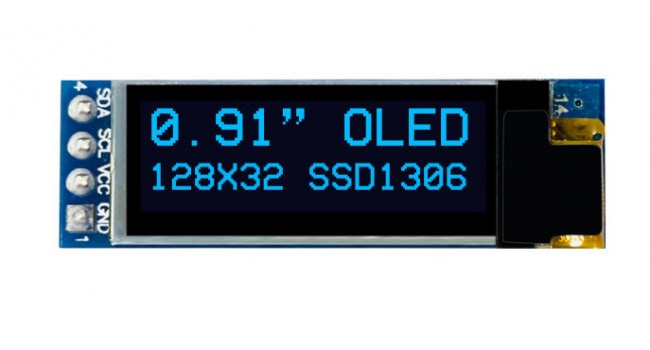
OLED or organic light-emitting diode is a light-emitting diode (LED) in which the emissive electroluminescent layer is a film of organic compound (millions of small LED lights) that emits light in response to an electric current.
An 128×32 OLED device can be considered as a matrix of 4,096 individual pixels that each can individually be set ON – they light up – or OFF – just background. Because background is ink black the ON pixels stand out pretty nicely and readability is perfect. Due to this pixel configuration it is possible to design and display graphic bitmaps: logos, avatars, sprites.
The display uses the SSD1306 chip and can be interfaced with any microcontroller through I2C/SPI communication protocol.
Features
- Interface: I2C
- Resolution: 128 x 32
- Diagonal Screen Size:0.91"
- Display area: 7mm x 25mm / Board Size 12.0mm x 39mm
- Thickness: 4mm
- Pixel Size (mm):0.159 × 0.159
- Technology: OLED Blue
- Graphic Driver IC is SSD1306
- Wide input voltage: 2.5V-5.5V
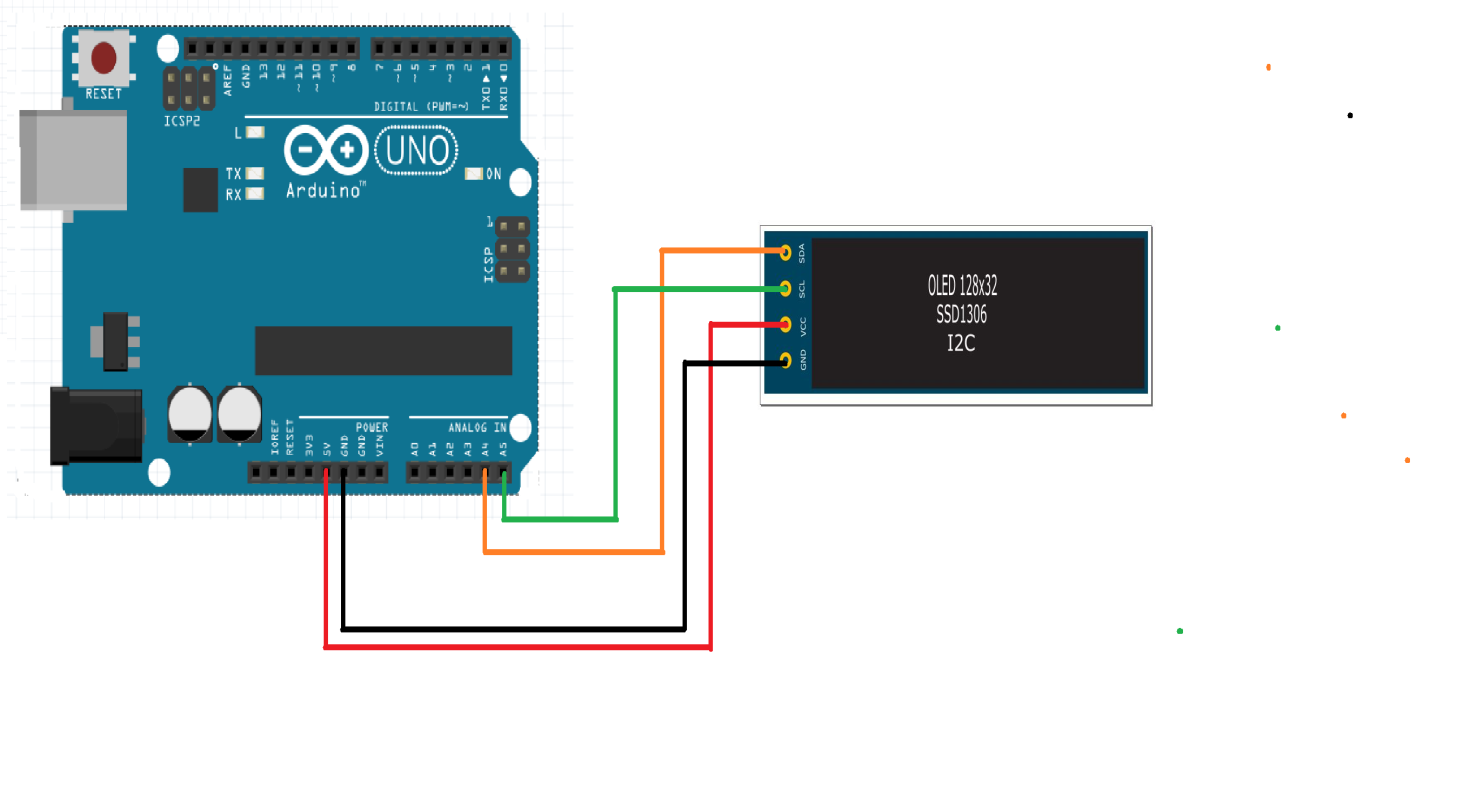
OLED 128x32 I2C Display Pinout
This oled display works on i2c communication, So it has only four pins.
- SDA(Serial Data) carries the data.
- SCL(Serial Clock) clock line. It is used to synchronize all data transfers over the I2C bus.
- GND goes to ground pin
- VCC goes to 5v
Connection of OLED Display with Arduino UNO
- SDA(Serial Data) – A4 of Uno Board(on the Mega it is 20)
- SCL(Serial Clock) – A5 of Uno Board(on the Mega it is 21)
- VCC - 5V of Uno
- GND- Gnd of Uno
Libraries Required
To control the OLED display you’ll need the "Adafruit_GFX.h" library and the "Adafruit_SSD1306.h" library. There are two ways you can download and install the library to your Arduino IDE. Wire.h library allows you to communicate with I2C / TWI devices. By default this library is included in Arduino IDE .
Method 1
- Go to Sketch menu.
- Select Include Libraries.
- Go to Manage Libraries.
- Search for ADAFRUIT GFX and INSTALL it.
- Search for ADAFRUIT SSD1306 and INSTALL it.
Method 2
You can install it externally using the following link.
The display library :https://github.com/adafruit/Adafruit_SSD1306
GFX Library: https://github.com/adafruit/Adafruit-GFX-Library
After downloading the zip files,
Go to Sketch → Include Library → Add .ZIP library
Then add the downloaded zip files.
Now the libraries are included in your Arduino IDE.
Adafruit library comes with really good examples for both 128x32 and 128x64 displays.
You will find examples of oled display under File > Examples >Adafruit SSD1306 > and then select the display type in the Arduino IDE.
Sample Code
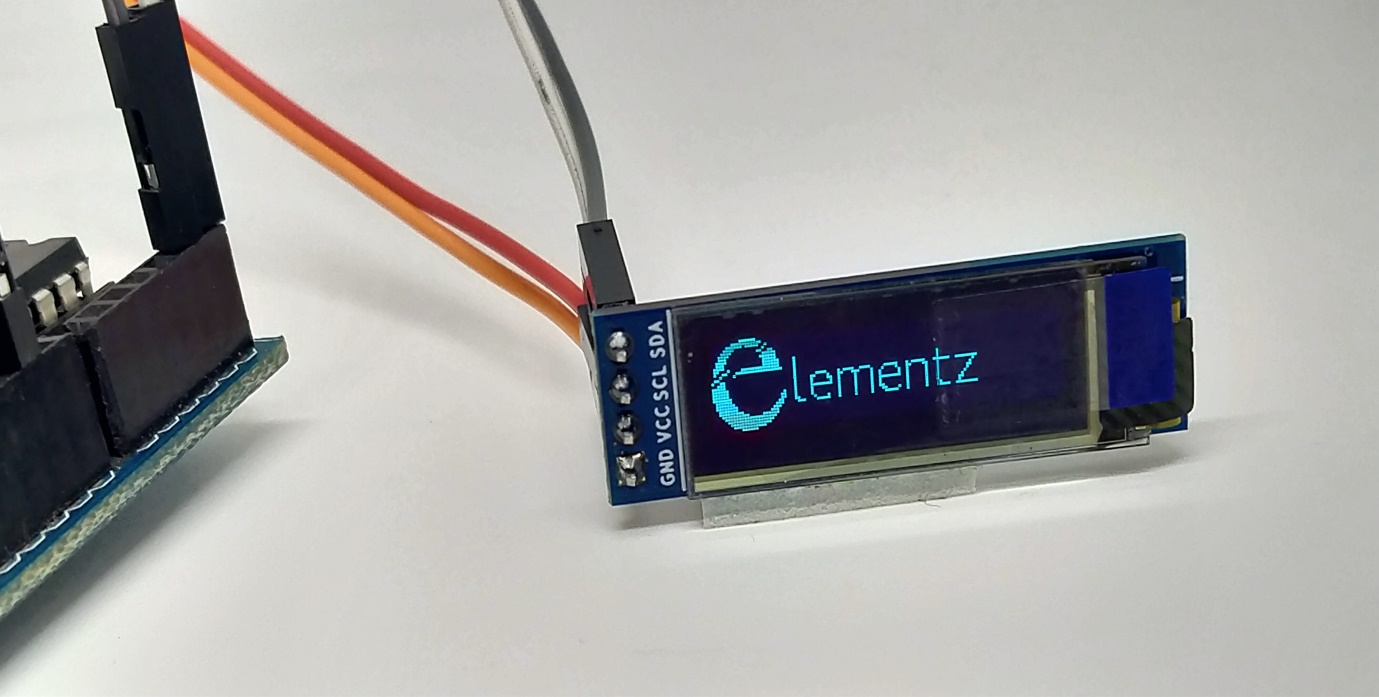
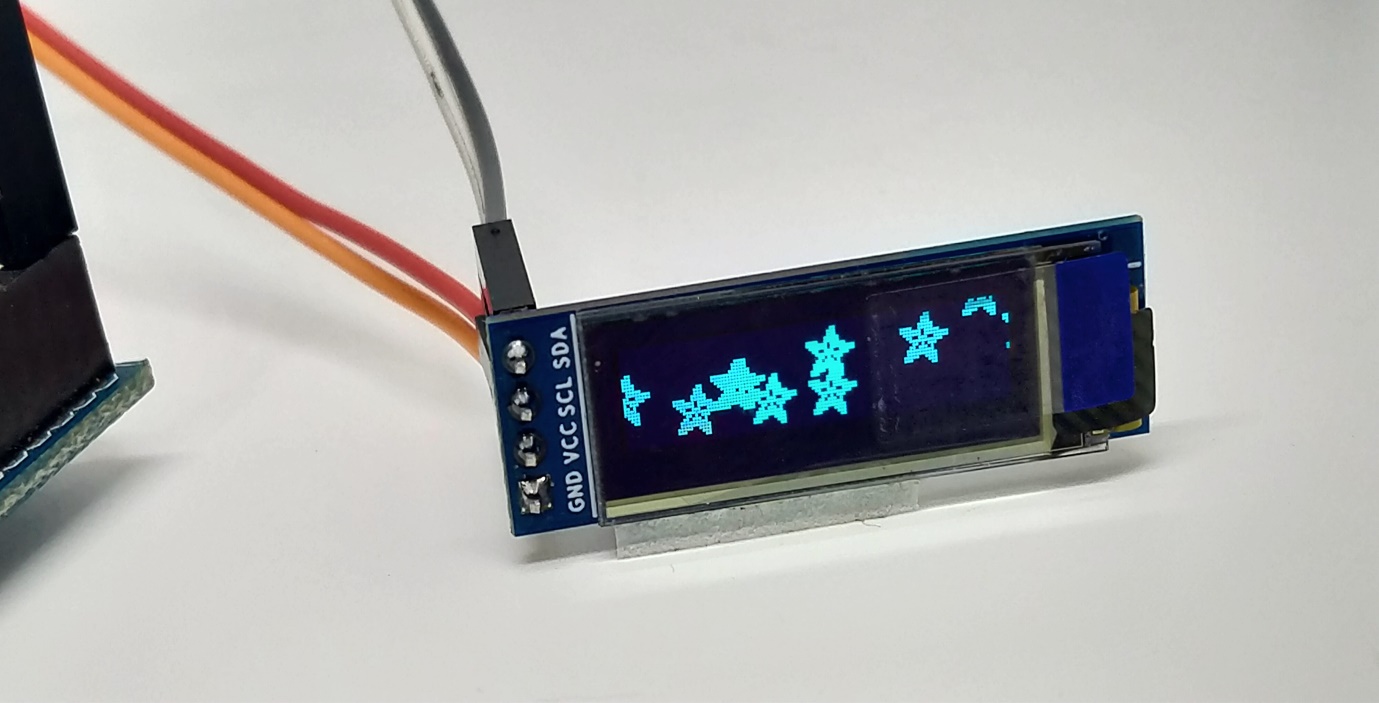
Here we have displayed our logo and a simple bitmap pattern.
Bitmap Creation
image2cpp is a simple tool to change images into byte arrays (or your array back into an image) for use with Arduino and (monochrome) displays such as OLEDs. It was originally made to work with the Adafruit OLED library.
The tool is available in this link: https://javl.github.io/image2cpp/
You can easily convert any image to a bitmap pattern and give that byte array in your sample code. Hence we will get the required pattern in the display.
Testing
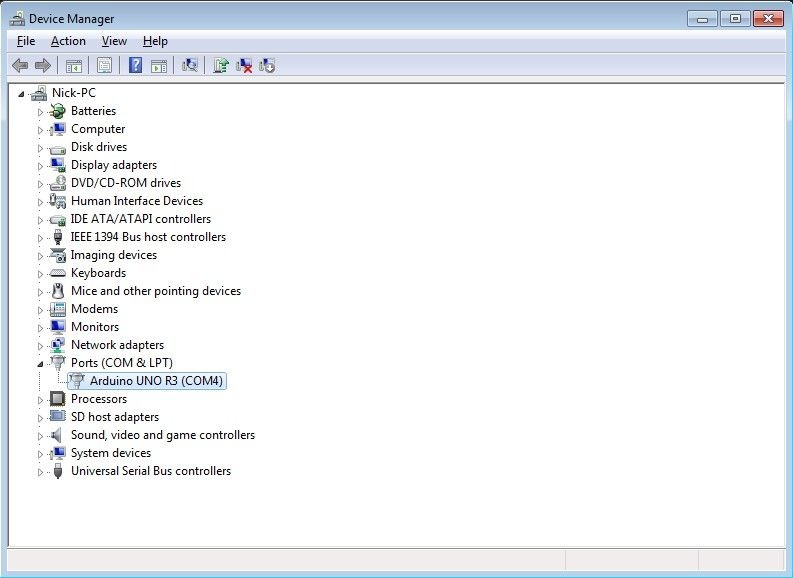
STEP 1:
Connect the A to B cable to the USB port of a computer and make sure that the port has been detected by checking the Device Manager option.
STEP 2:
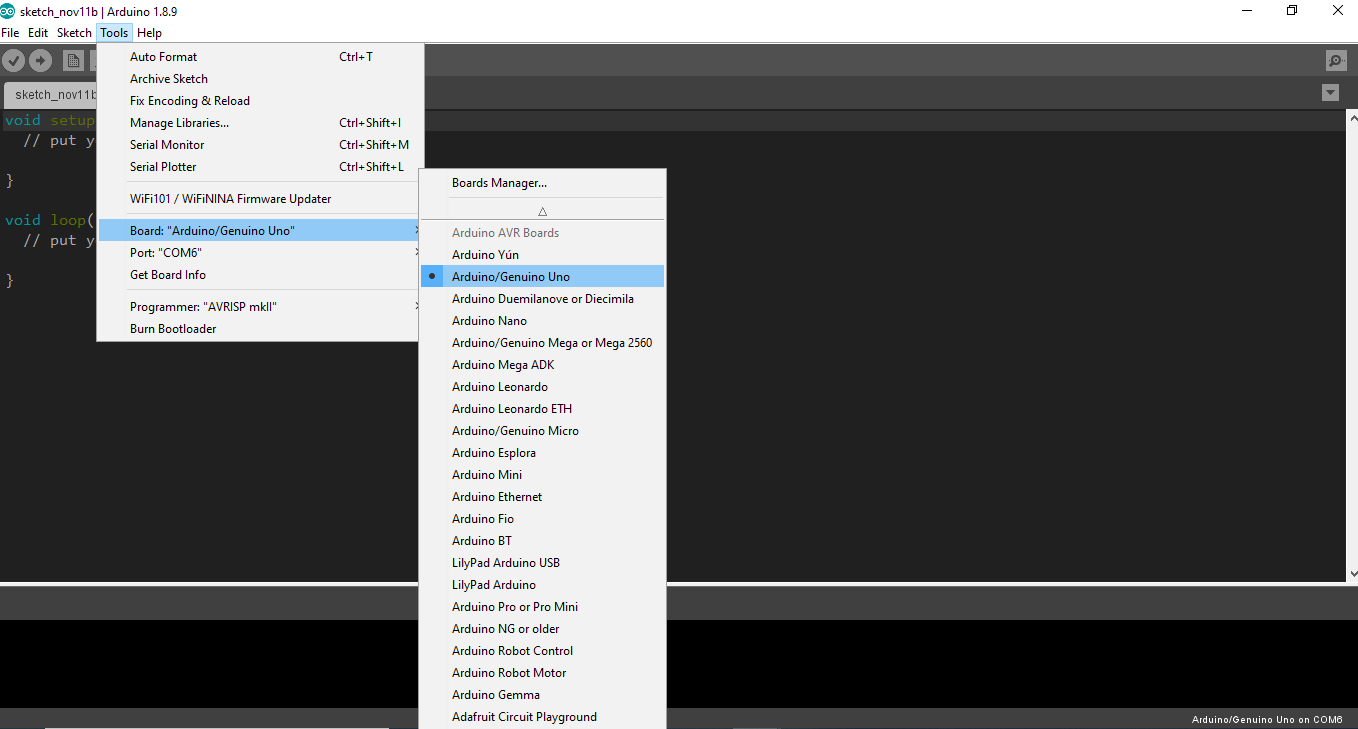
Open two Arduino IDE window and Select Arduino UNO as Board and select the appropriate COM port.
Board: Tools > Board > Arduino/Geniuno UNO.
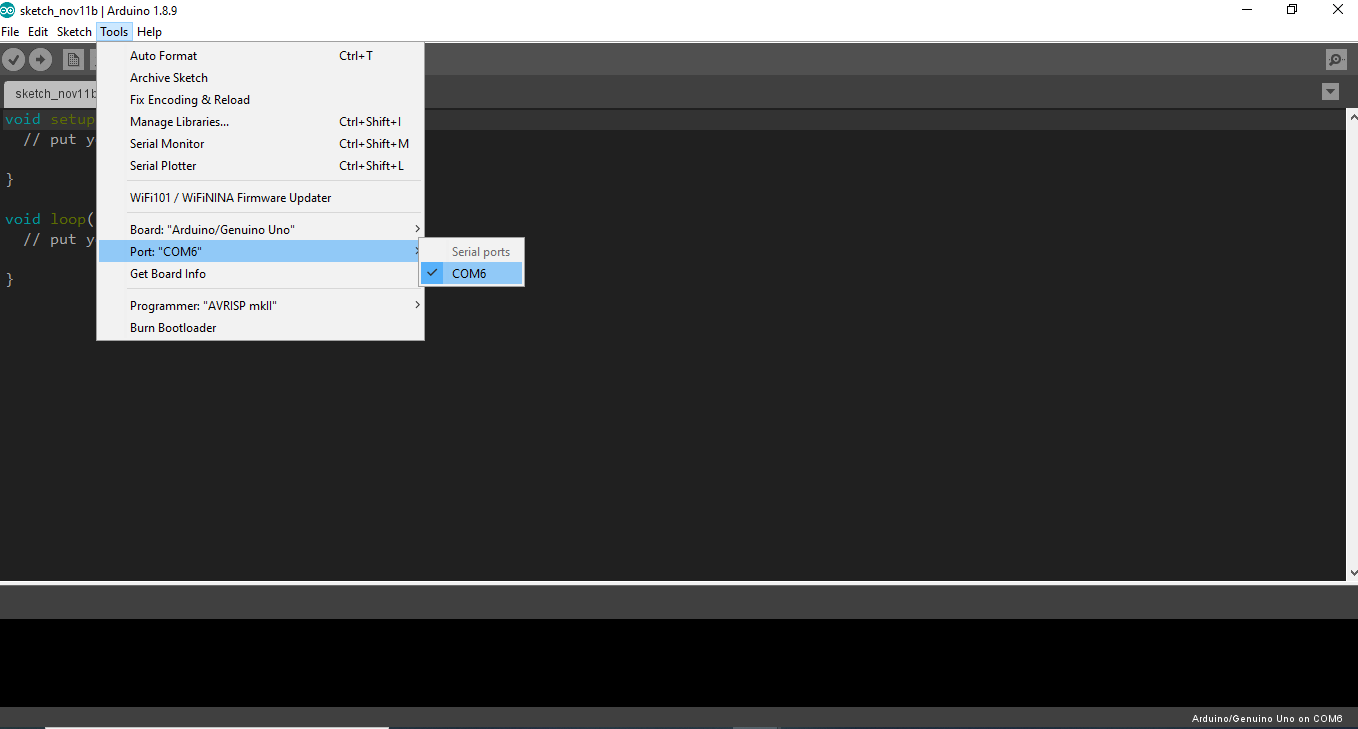
STEP 3:
Port: Tools > Port in Arduino.
STEP 4:
- Compile and upload this program to your Arduino Uno board via Arduino IDE
- After Done Uploading, you will see the generated bitmap patterns in the OLED display.
")
")


