


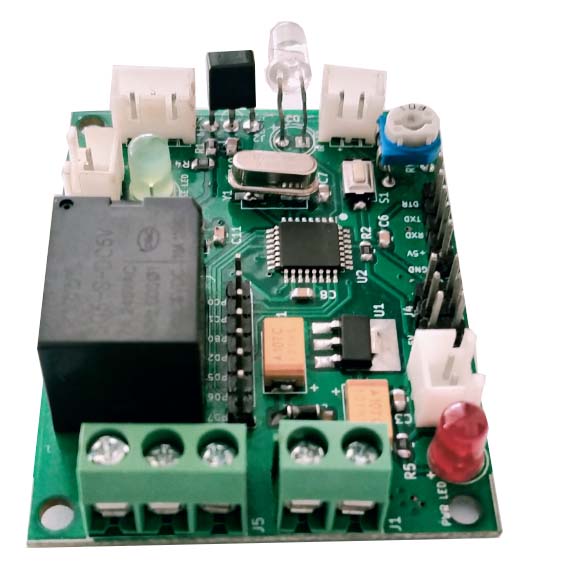
Frequent sanitization of hand has become critical to be safe and healthy. As a preventive measure to tackle this situation, we have released the AutoSanitiser board. It comes with IR based technology which makes it operationally fully automatic and touch-less. It is particularly useful for areas where there is a gathering of visitors or employees.
TECHNICAL DETAILS
- Arduino compatible: ATmega328P onboard.
- Power Supply: 7V - 12V input.
- Onboard IR Led & Receiver.
- Optional JST connectors for connecting IR Led & Receiver for bringing it out to a casing if required.
- Onboard Power Led & Sense Led.
- Optional JST connectors for connecting Power Led & Sense Led for bringing it out to a casing if required.
- Onboard Relay.
- Extra pins for extending the functionality.
- Onboard Preset for adjusting the sensitivity of the IR .
PIN CONNECTIONS
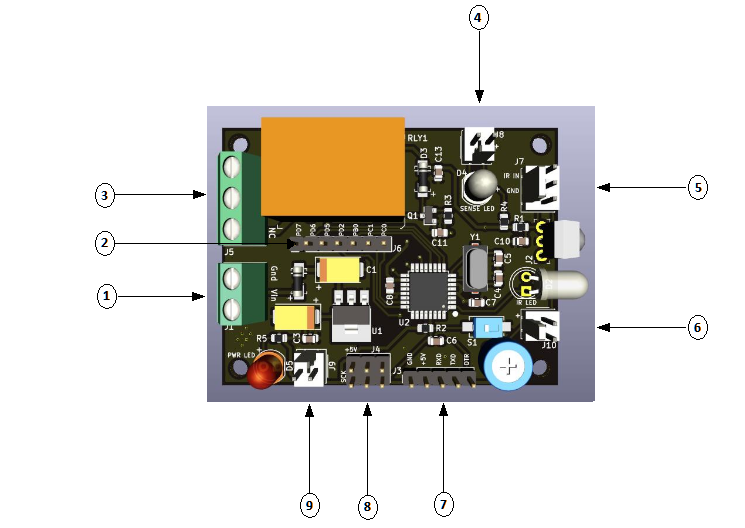
1. Screw Terminal Connector for 5V Power supply.
- Device works with 5V - 2 Amps DC Power supply. Polarity marked on Bottom side.
- Ensure correct polarity before powering on the device.
2. Jumper Connection for Microcontroller interfacing
- Can be used to interfacing extra peripherals such as sensors, keypads, led, LCD displays etc with microcontroller
3. Screw Terminal Connector
The high-voltage side has two connectors, each with three sockets: common (COM), normally closed (NC), and normally open (NO).
- COM: common pin
- NC (Normally Closed): the normally closed configuration is used when you want the relay to be closed by default, meaning the current is flowing unless you send a signal from the Arduino to the relay module to open the circuit and stop the current.
- NO (Normally Open): the normally open configuration works the other way around: the relay is always open, so the circuit is broken unless you send a signal from the Arduino to close the circuit.
4. Jumper Connection for LED indication
- To extend LED indications. It gets turned On and turned Off according to the presence of object in front of the sensor.
5. Jumper Connection for TSOP (Receiver)
- To extend the Sensor Receiver pin.
6. Jumper Connection for IR LED (Transmitter)
- To extend the Sensor Transmitter pin.
7. TTL Jumper for UART Interfacing
- UART TTL headers to upload programs
8. TTL Jumper for SPI Interfacing
- To interface board through SPI pins.
9. LED Indications
- To extend LED indications for PWR – Power
TESTING
PART 1
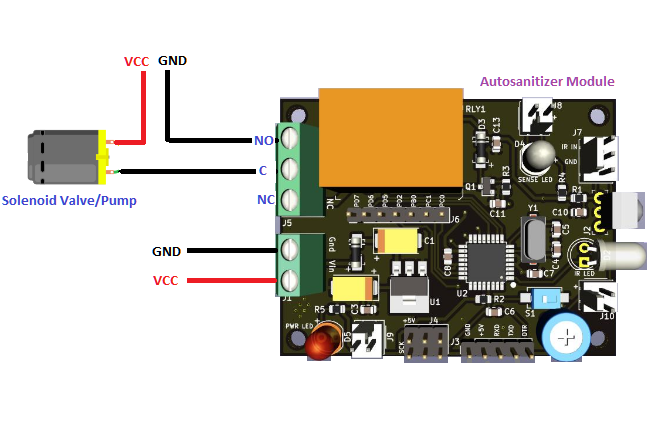
The board can be directly used as Automatic Sanitizer only power supply and solenoid valve /pump need to be connected. Program is already uploaded in the board.
Show hands in front of the IR Led, the receiver senses the hand and triggers the relay. You can connect a solenoid valve or pump to the relay. After a brief instant, the relay goes back to initial state, so a small quantity of sanitizer or hand wash liquid will be dispensed. Then it waits for a few seconds, after that only it can be re-triggered.
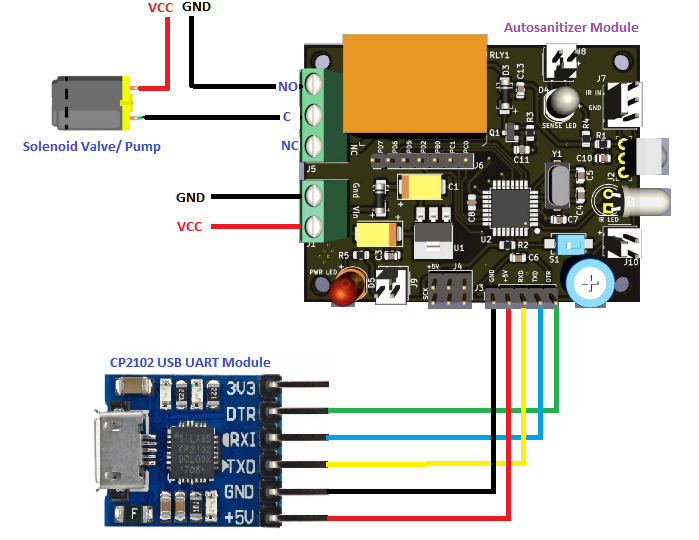
PART 2
If you want to make any changes in the program the following steps can be used. To upload program into the board CP2012 USB UART Module is connected as shown the below circuit diagram.
STEP 1:
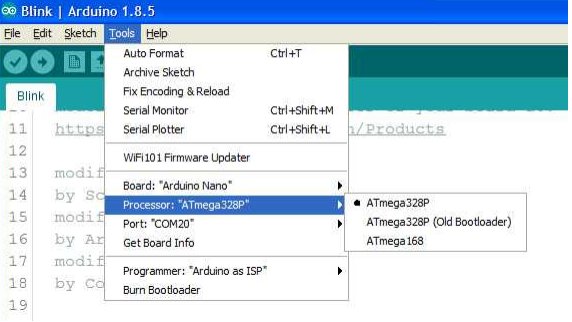
- Open Arduino IDE window and Select Arduino NANO as Board and select the appropriate COM port.
- Board: Tools > Board > Arduino/Geniuno NANO.
- Processor > ATmega328P
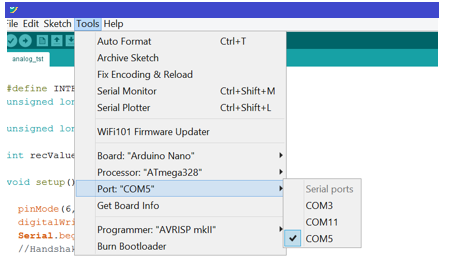
STEP 2:
Port: Tools > Port in Arduino.
STEP 3:
- Compile and upload this program to your AutoSanitizer board via Arduino IDE
Source Code can be downloaded from the link given below:
https://github.com/elementzonline/Arduino-Sample-Codes/tree/master/AutoSanitizer/main
For any product related queries or tech information feel free to reach out to us at info@elementzonline.com


")
")