


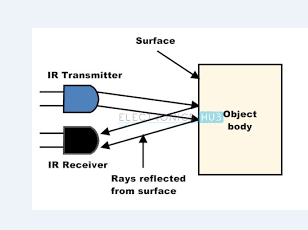
The emitter is an IR LED and the detector is an IR photodiode. The IR photodiode is sensitive to the IR light emitted by an IR LED.This is the underlying working principle of the IR sensor. When the IR transmitter emits radiation, it reaches the object and some of the radiation reflects back to the IR receiver.
FEATURE
- 5VDC Operating voltage.
- I/O pins are 5V and 3.3V compliant.
- Range: Up to 20cm.
- Adjustable Sensing range.
- Built-in Ambient Light Sensor.
- 20mA supply current.
- Mounting hole.
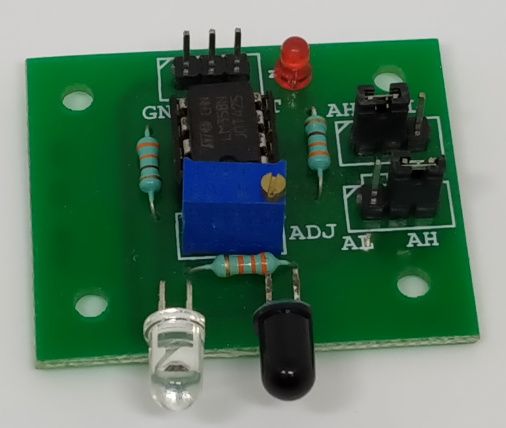
CONNECTION
- IR Sensor has three pins(GND,V,OUT).
- It works under 5v. Connect V pin of sensor with Arduino 5v
- GND pin of IR connected to GND of Arduino
- Interface OUT pin of sensor with 2 nd pin of Arduino
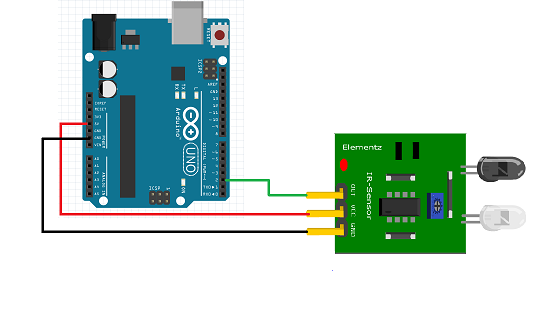
CIRCUIT DIAGRAM
CODE
The link of the sample code used can be found here.
TESTING
STEP 1:
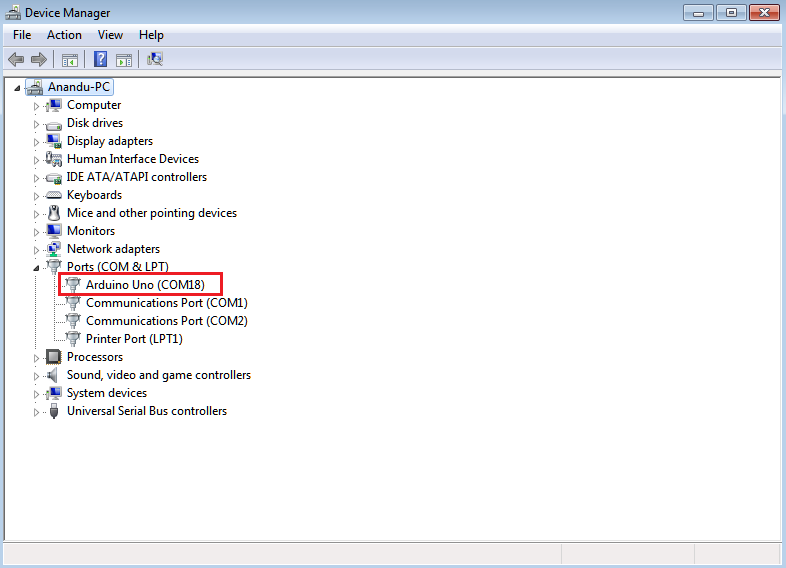
Connect the A to B cable to the USB port of a computer and make sure that the port has been detected by checking the Device Manager option.
STEP 2:
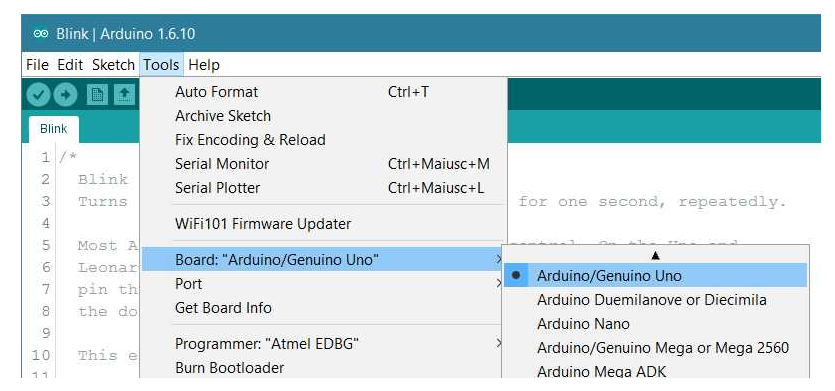
- Open two Arduino IDE window and Select Arduino UNO as Board and select the appropriate COM port.
- Board: Tools > Board > Arduino/Geniuno UNO.
STEP 3:
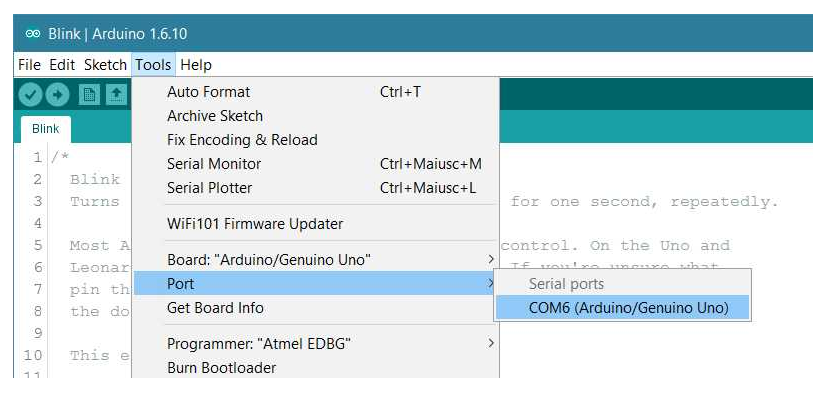
Port: Tools > Port in Arduino.
STEP 4:
- Compile and upload this program to your Arduino Uno board via Arduino IDE
- Place the object in front of IR proximity sensor and observe the change in LED connected to Pin 13 (on board LED)
- When you remove object you will see it gets turned off.
Output can be also seen through Serial monitor.

NOTE:
If you wish to change pin numbers then you can do so by varying the pin number in the program line const int obstaclePin =2
For product related inquiries or any tech related information feel free to reach out to us on info@elementzonline.com


")
")


