


 with SIM7600 4G GSM Modem using MBIM interface in Linux")
This post is intended to show how to set up a data connection over the MBIM interface using libmbim and driver cdc_mbim in Linux.There is a open source Linux in-kernel driver supporting MBIM interface and it is called cdc_mbim. The library libmbim can be used to communicate with the cellular devices over the interface and do necessary configurations to trigger the data connection over the cellular network.
TEST SETUP
- The modem can be powered using power micro USB port. Alternatively you can connect a '''5-12V/9V 1A''' adapter to the power jack provided on the modem. The voltage regulator regulates the voltage to 3.6 V.
- Switch on the modem using the ON/OFF switch provided, note when you switch on, the Power LED will glow. It shows that the modem has got the power required for
- its operation. After 2 or 3 seconds, the Status LED, Network LED, Ring LED will be ON.
-
Connect the Data 1 and Data 2 port of the modem to the PC using a micro USB cable.
-
Data 1 - AT command port for accessing AT commands.
-
Data 2 – Data serial port for accessing Internet, Audio, Calling and SMS, GPS
-
- Insert the Jio 4g SIM card in the SIM slot of the modem.
NOTE:- When you insert the SIM, the network led( blue led) starts blinking after 1 or 2 seconds, that means the modem is registered with the network.
Switching the SIM7600 to MBIM driver mode
By default the SIM7600 PID is 9001 and the PID configuration is 9001:Diag, NMEA, At, Modem, Audio, Rmnet. To setup data connection over the MBIM interface we need to change the PID to 9003(9003:Diag, NMEA, At, Modem, Audio, MBIM).
AT commands can be send to the 4G modem through the AT command port for changing the network mode. PuTTy terminal is used for communicating with serial port.
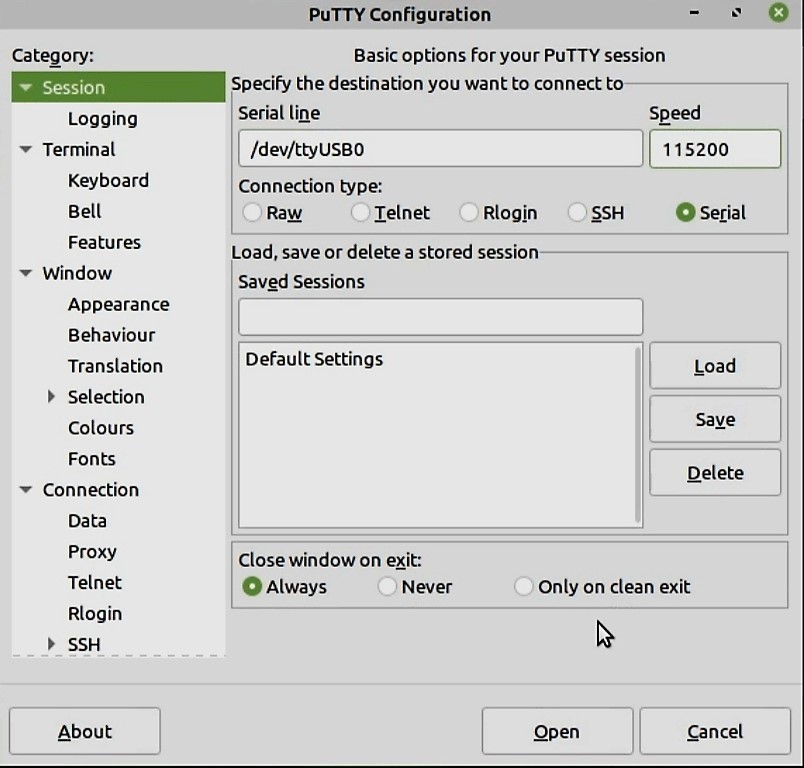
Baud rate is 115200 for SIM7600 modem.
Note: If you want to know in which port you are connected, run the command dmesg in the pi terminal. Here it is /dev/ttyUSB0.
Use the following commands:
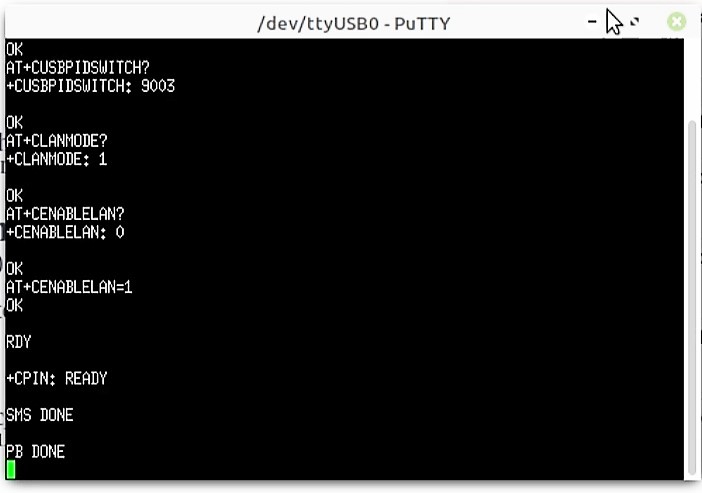
AT+CUSBPIDSWITCH=9003,1,1
You will get a response as OK
SIM7600 supports Wan mode and LAN mode. Customer can use AT command to change the mode. For sharing the net to PC, the Wan mode has to be used. SIM7600E Module works in wan mode in default. You can check the current mode using
AT+CLANMODE?
Module should respond with
OK, 1
If the module is not in Wan mode then the mode can be switched using the following command:
AT+CLANMODE=1
After run this command, modem will restart automatically, then the modem will work in wan mode.
LAN9730 is not opened in default, if want to open the LAN9730, you can run
AT+CENABLELAN=1
After run this command, the modem will restart automatically, then the LAN9730 will be opened.
If the module is not in Wan mode then the mode can be switched using the following command.
AT+CLANMODE=1
After run this command, module will restart automatically, then the module will work in wan mode.
Important Note: Make sure that you are connecting the modem in WAN mode (AT+CLANMODE=1) to get internet in PC.
LAN9730 is not opened in default, if want to open the LAN9730, you can run
AT+CENABLELAN=1.
After running this command, the module will restart automatically, then the LAN9730 will be opened.
Preparing SIM7600 for MBIM connectivity
First install the libmbim Linux library using your system package manager like apt etc.
The mbim functionality can be used by installing the libmbim-utils with the following command.
sudo apt install libmbim-utils
Verify that you have the Linux in-kernel cdc_mbim driver installed for the cellular modules exposed MBIM interface endpoint over USB using the command:
lsusb –t

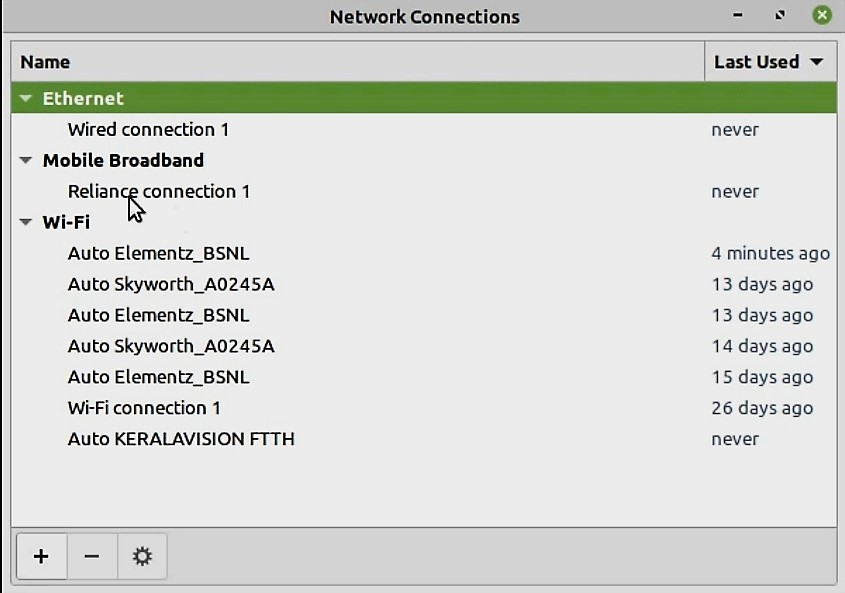
Configuring the Network Connections in PC
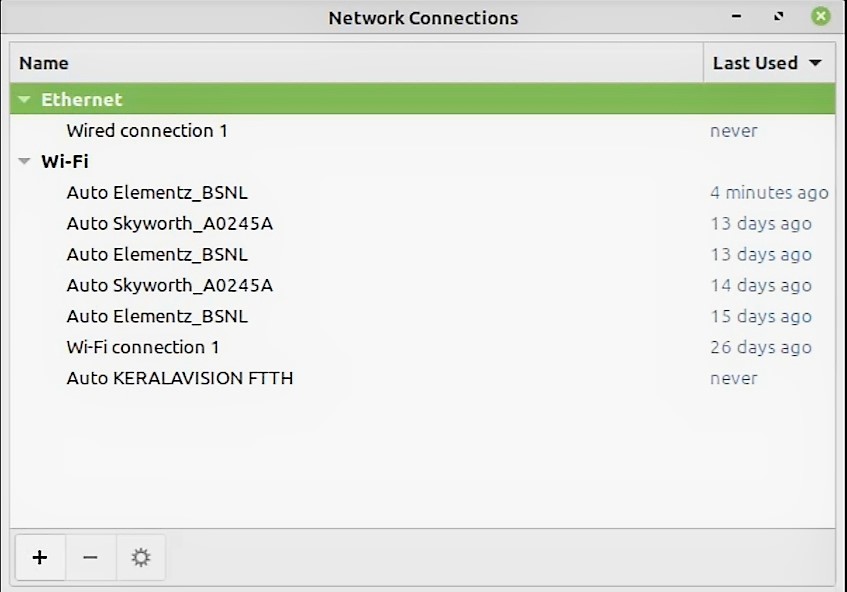
- Go to the network connections.
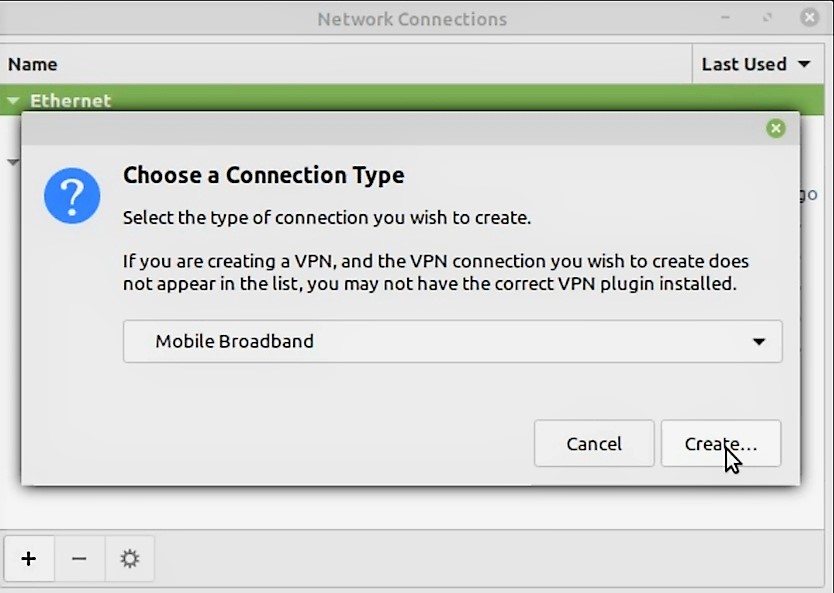
- Click ‘+’ and choose a connection type. Select the type of connection we want to create. Here we have to select Mobile Broadband. Then click Create.
- Save the settings and continue.

- Choose your provider’s country or region. Click Next.

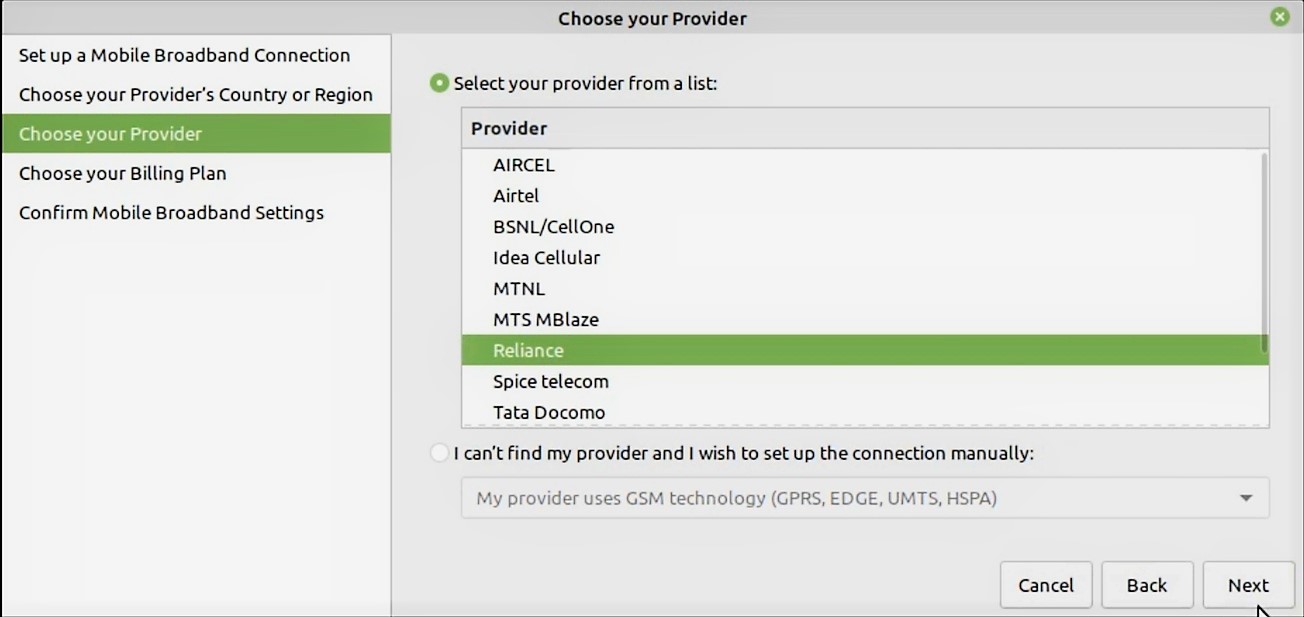
- Choose Your Provider. Since we are using Jio 4G SIM ,we choose Reliance. Click Next.
-
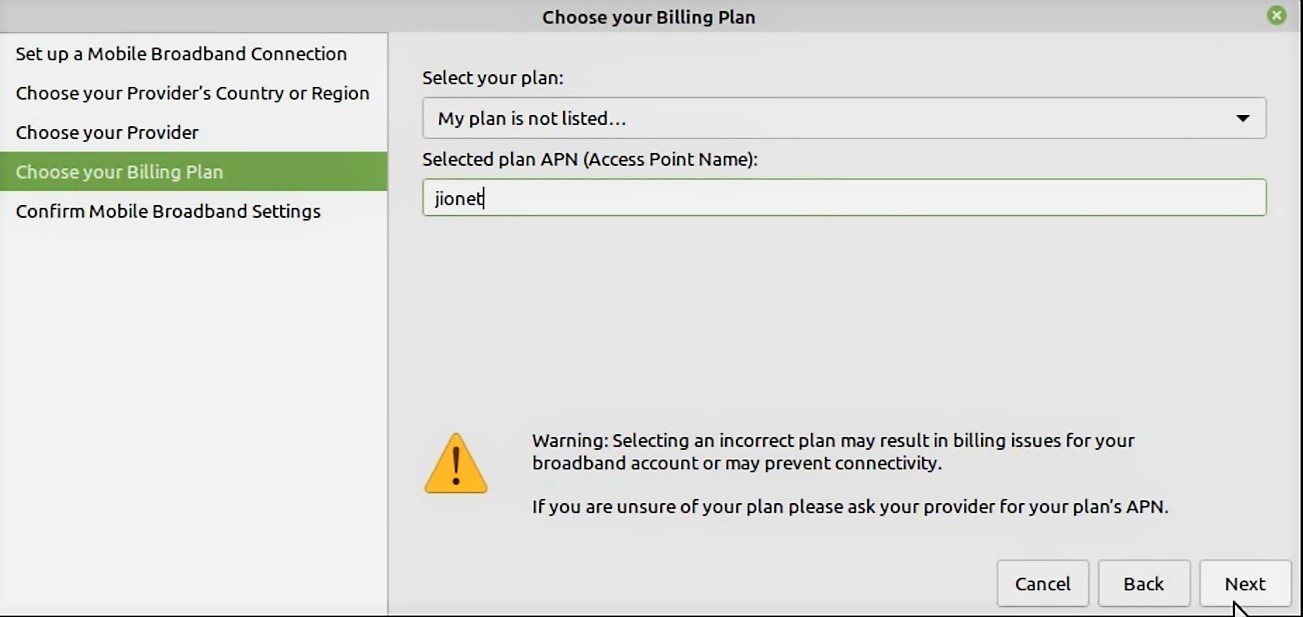
Choose Your Billing Plan.
-
Select your plan as : My plan is not listed
-
Selected plan APN should be given as: jionet
-
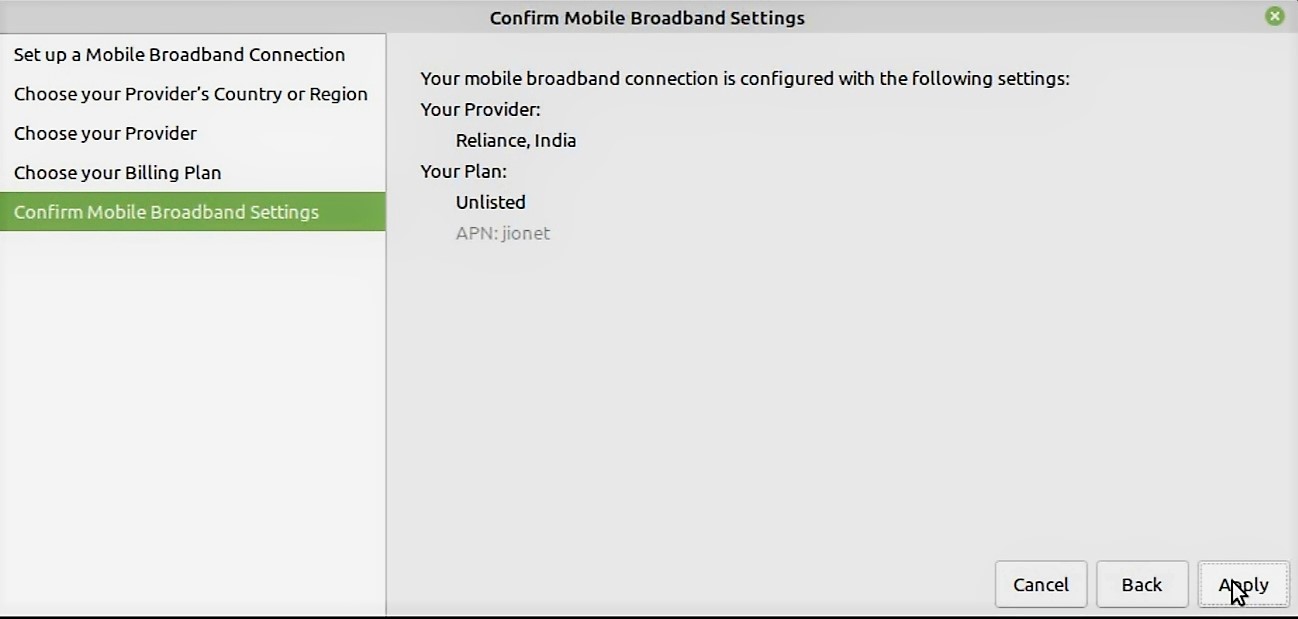
- Confirm Mobile Broadband Settings. Click Apply
- Save the settings and continue.
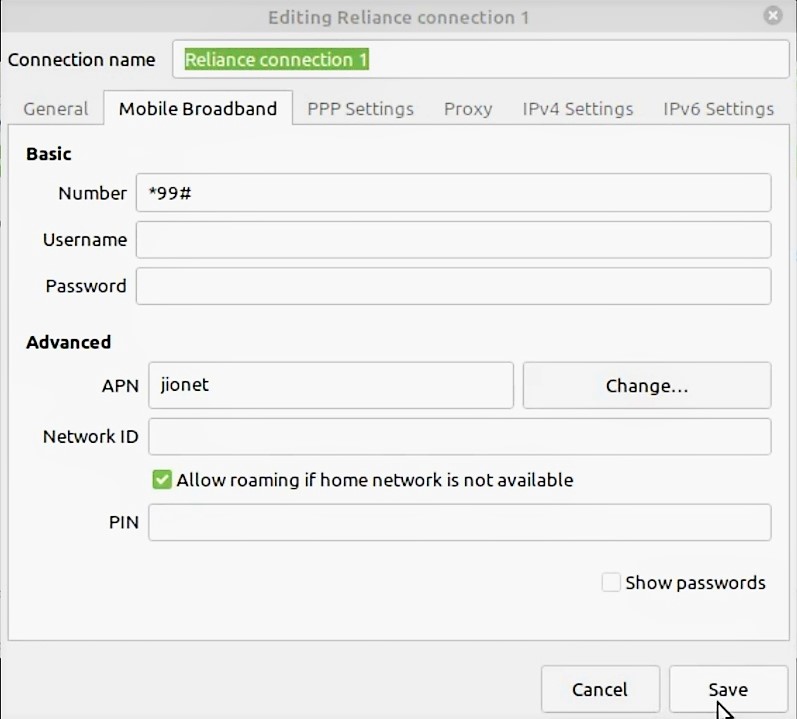
- Now you can see the Mobile Broadband is added to the list of Network Connections. Select the Reliance Connection 1
- If you check the Internet Access, you can see the Jio 4G network connected with the pc .
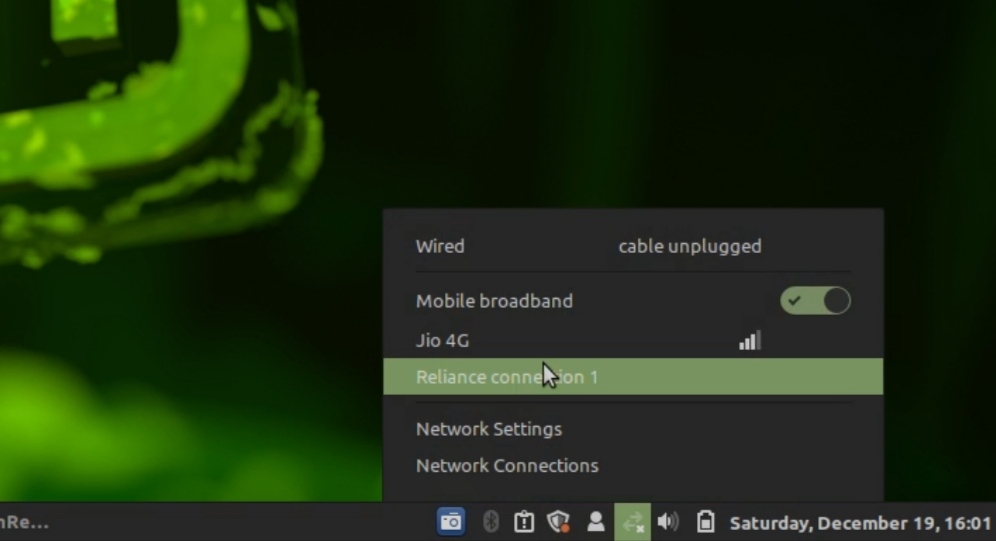
- So you are now connected to the Internet! Open up your web browser and browse away!
")
")